[note: advanced users]
You do run your home lab/on-site servers isolated? Right? Right? Of course you do. Running servers and containers on your network brings great capabilities and local services. However, exposing them to the Internet will expose your network to a world of vulnerabilities. More on that in another post…
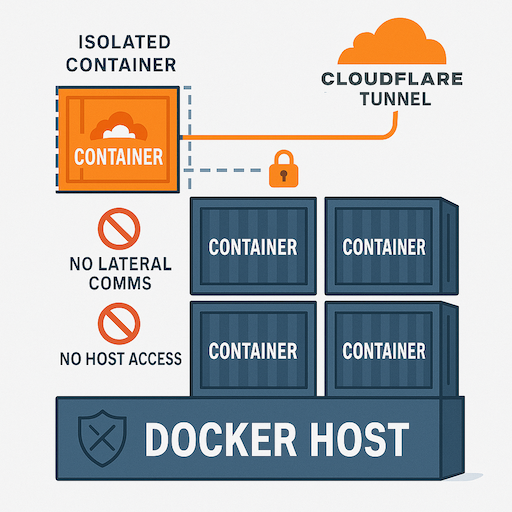
But, what happens when you have a service so useful, you want to access it from anyplace? You don’t want to expose it to the Internet directly because it exposes your network. Cloudflare Tunnels are a great way to run a server or service in an isolated fashion that is accessible both from the Internet and your local network (as if it were an Internet node). Read more here.
I wanted to run an n8n automation server and be able to access the workflows from outside my network so a Cloudflare tunnel seemed like a great fit: a DNS record, isolated containers, and Internet access!
(Note: for this solution to work, you must have a FQDN (domain) available that you control and add hosts/IPs to a DNS record)
1️⃣ To setup the Cloudflare tunnel follow Cloudflare’s documentation. Assign a memorable Public Server name (server.domain) for your DNS lookup. For the service url make sure to include the host and ports used for your server. For example:
Public Server Name: http://hostname.cybercloudai.tech
Service URL: http://n8n:5678
As part of the setup, a token will be created; ensure you copy this token and securely store it. Cloudflare will automatically assign a DNS record to this tunnel.

2️⃣ Modify your Docker container. It’s easiest to use compose for this step. While you can use the command, it will get complicated. Add a docker service for Cloudflare’s “cloudflared” service. This Dameon service launches the server side of the cloudflare tunnel using the token generated in step one.
3️⃣ Important step… assign the default network to “external only” in your compose file. We don’t want the container communicating with the host or with any other docker containers. ONLY with the cloudflare tunnel.
Here is a sample Docker Compose file for an n8n server:
services:
  n8n:
    container_name: n8n
    image: docker.n8n.io/n8nio/n8n
    restart: unless-stopped
    ports:
      - 5678:5678
    volumes:
      - n8n_data:/home/node/.n8n
    environment:
      - TZ="America/New York"
      - N8N_HOST=hostname.cybercloudai.tech # <-- Update this name, it should match your cloudflare tunnel
      - N8N_PORT=5678
      - WEBHOOK_URL=https://hostname.cybercloudai.tech

  tunnel:
    container_name: cloudflared-tunnel
    image: cloudflare/cloudflared:latest
    restart: unless-stopped
    command: tunnel run
    environment:
      - TUNNEL_TOKEN=**paste your cloudflare token here**

volumes:
  n8n_data:
networks:
  default:
    external:
      name: externalonly
4️⃣ Launch the stack:
docker compose up -dYour site is now accessible from your Public Server URL that you created in the tunnel.
5️⃣ Secure your site. Your server is fully exposed to the internet and your local network is isolated. But that won’t protect your server from being targeted! make you take the right steps to maintain proper security, keeping your server updated, and monitoring your server.
Did this solution work for you? Comment below on how you solved this problem.


Leave a Reply